Pardini SP Trigger Adjustment
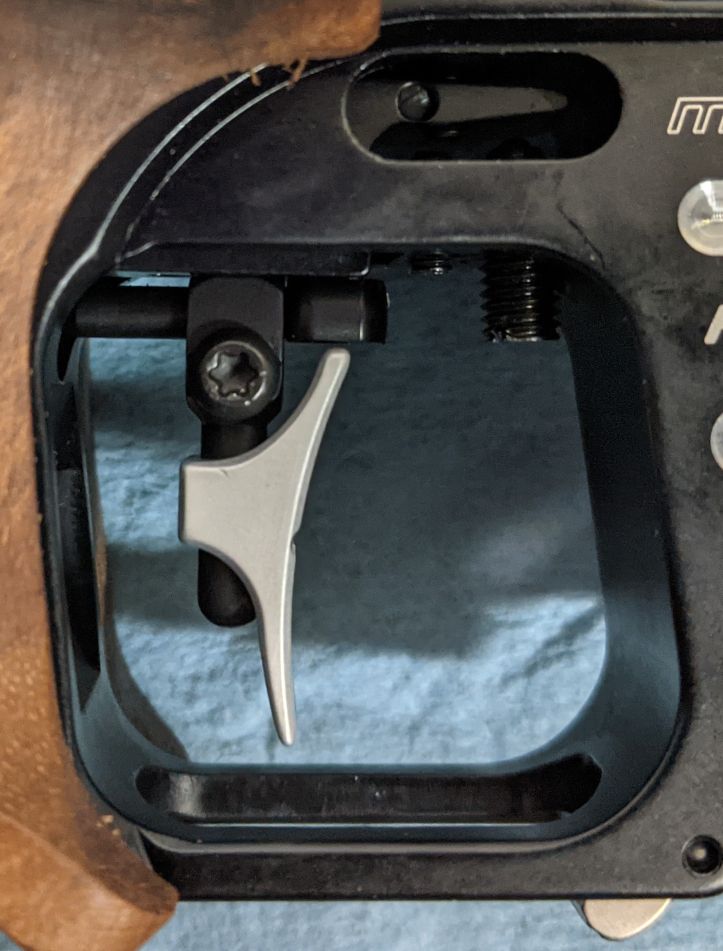
Note: If you want to position the trigger further forward (longer length-of-pull) than the amount of adjustment that is available just by sliding the trigger along the adjustment bar (part 758-N3, "Horizontal Trigger Rod"), you can unscrew the bar, turn it around, and screw it into the more rear-ward hole (yes, the hole that's further back; if you tried to turn it around and screw it back into the same hole, it would hit trigger adjustment screw "CS"). This allows the trigger to be positioned significantly further forward than would otherwise be possible.
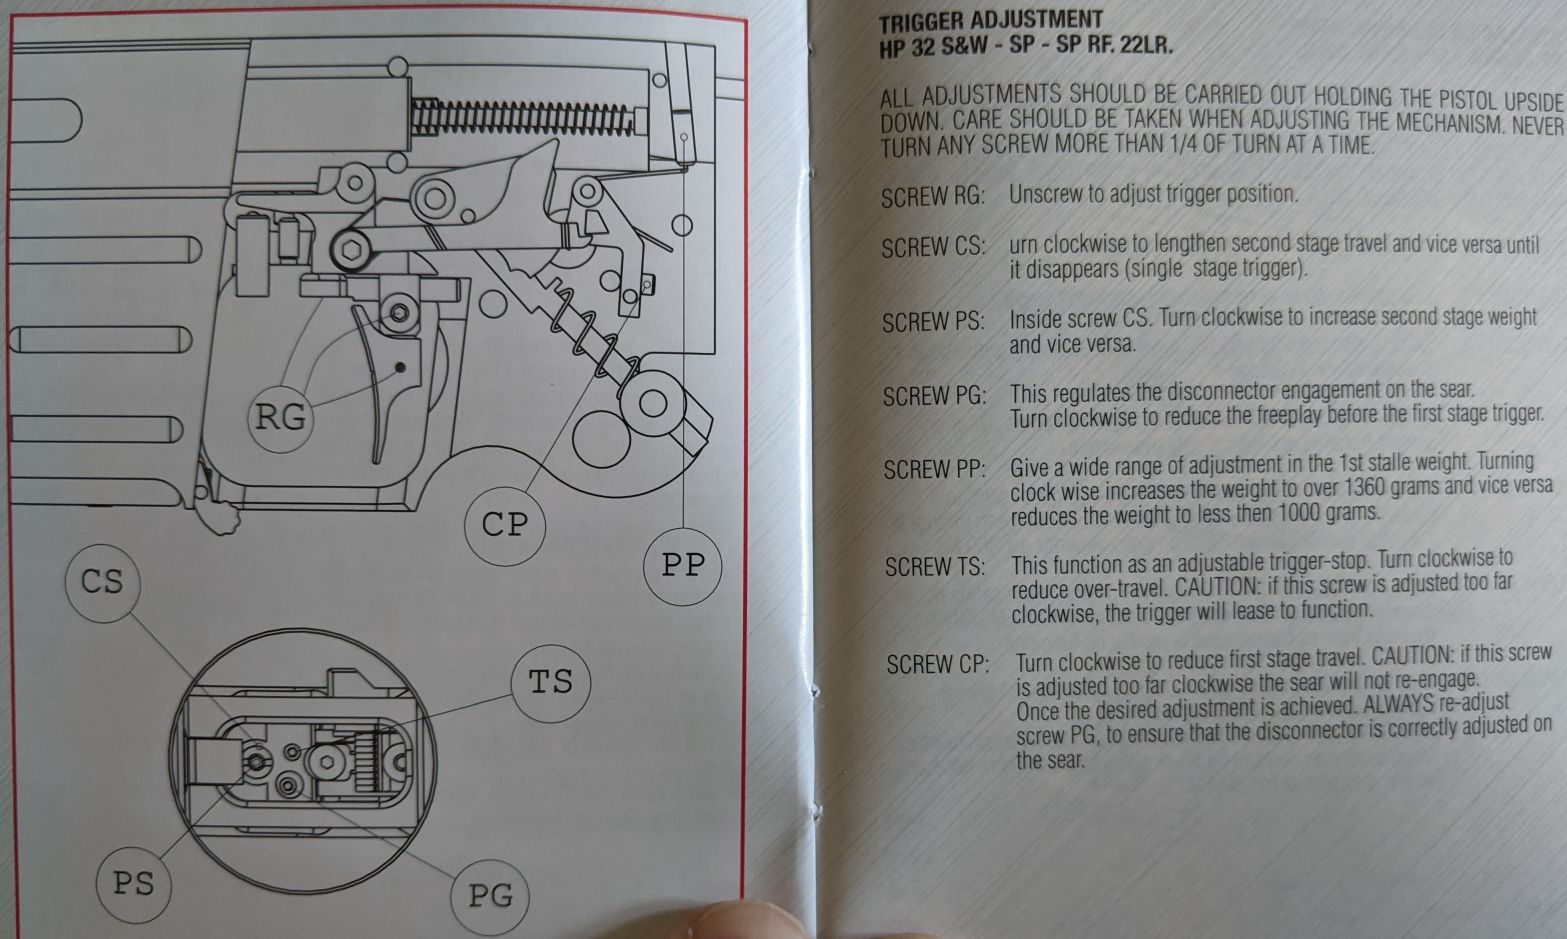
Manual (PDF), from the Italian site - Contains trigger adjustment information (pg 30-31).
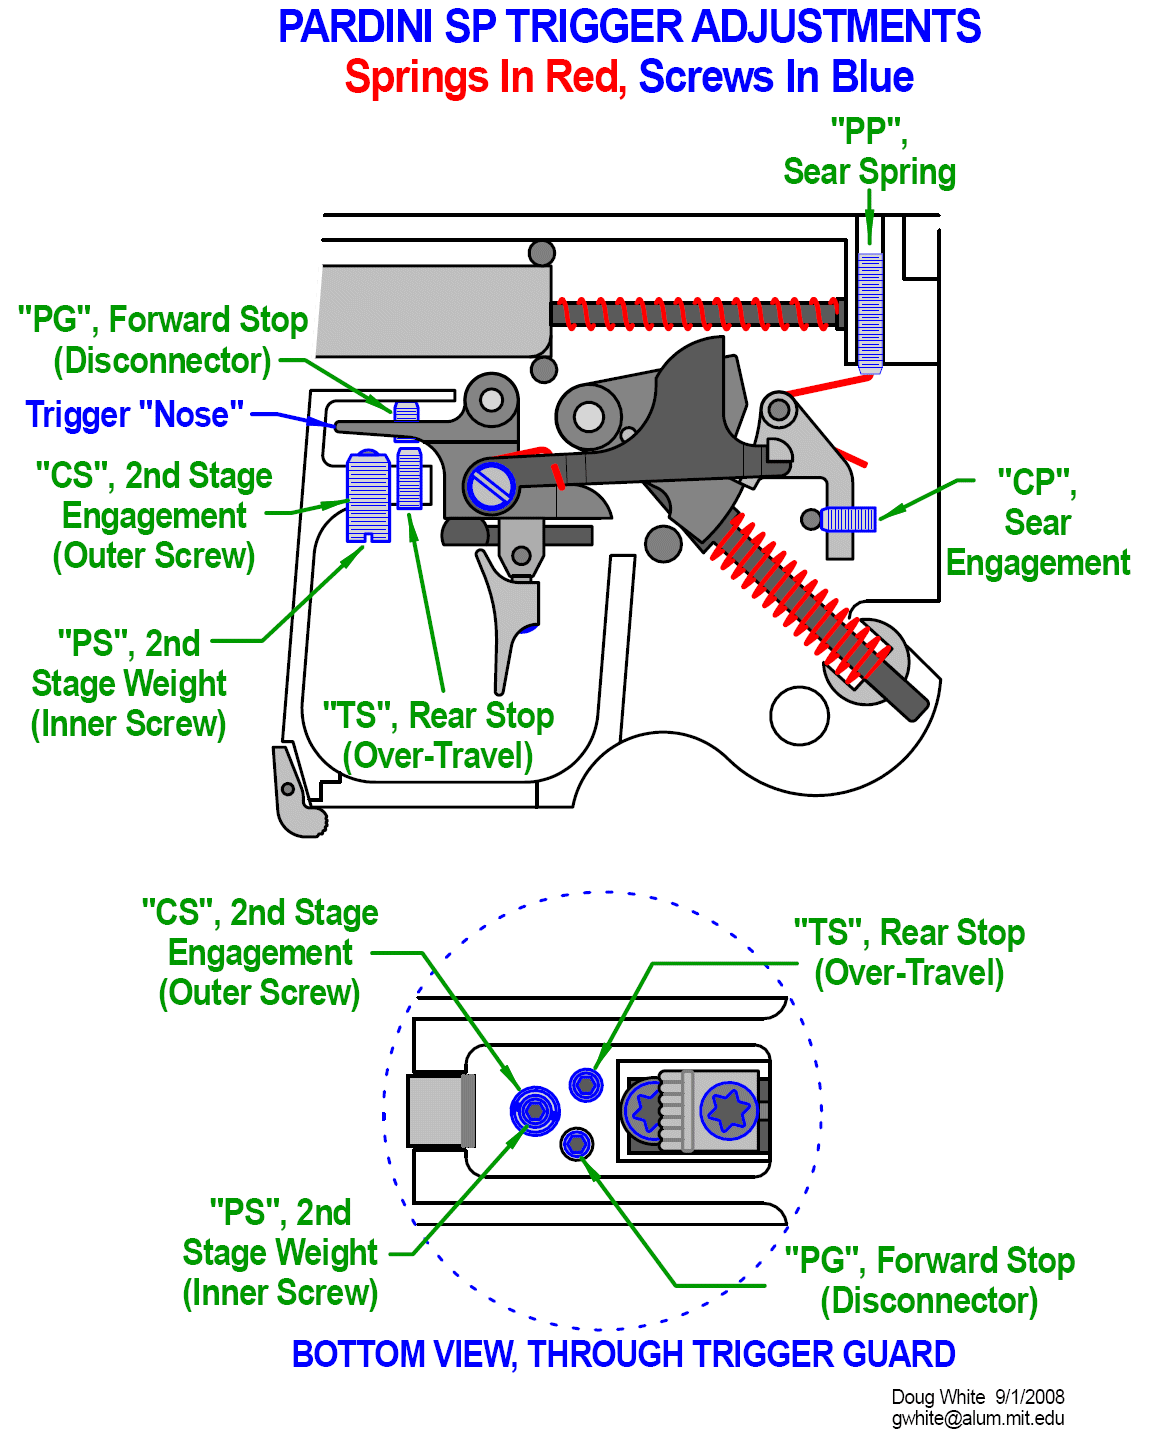
Trigger Adjustment diagram and explanations of each screw - US Site, tells you what each screw does, but not the proper procedure to adjust them all.
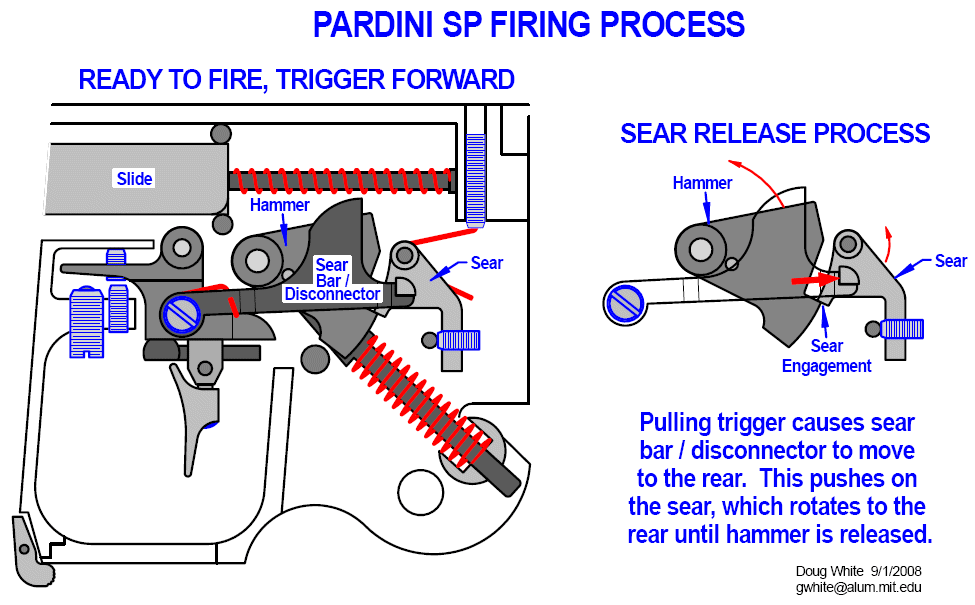
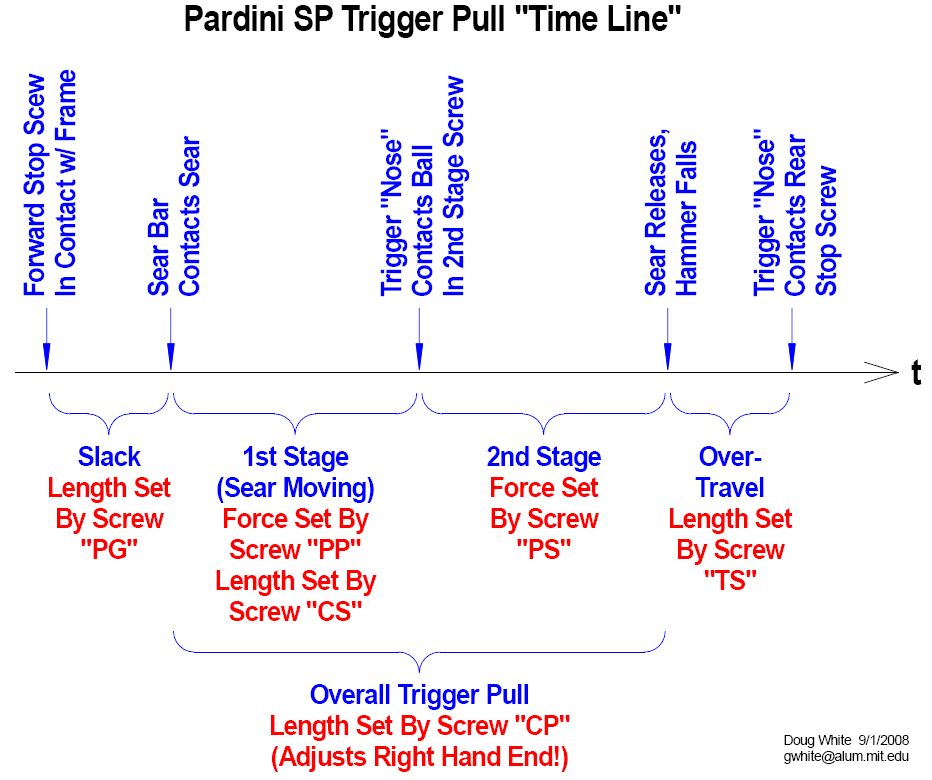
Target Talk Thread on trigger adjustment - with excellent diagrams by Doug White. Post from David M at Tue Apr 02, 2019 discusses the procedure to adjust the trigger!
Target Talk thread containing Don Nygord's Notes on Pardini trigger adjustment
Don Nygord's Notes - lots of information, including a section on Pardini SP/HP trigger adjustment

|
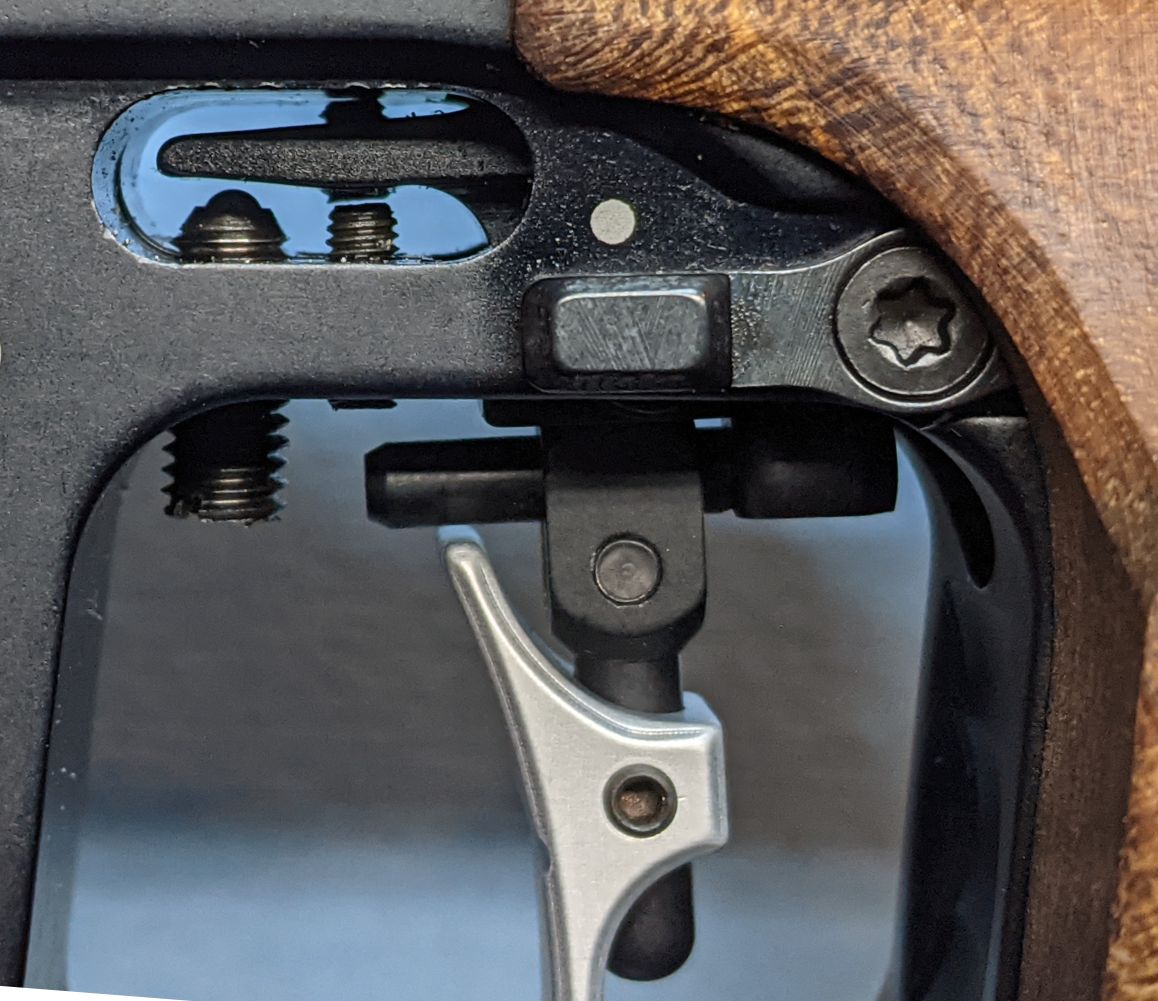
This view shows the how the pre-travel screw (PG) rests against the frame at the top. |
|